What You Need to Know About Radon Fan Installation for a Safer Home
Understanding the Role of a Radon Mitigation Fan
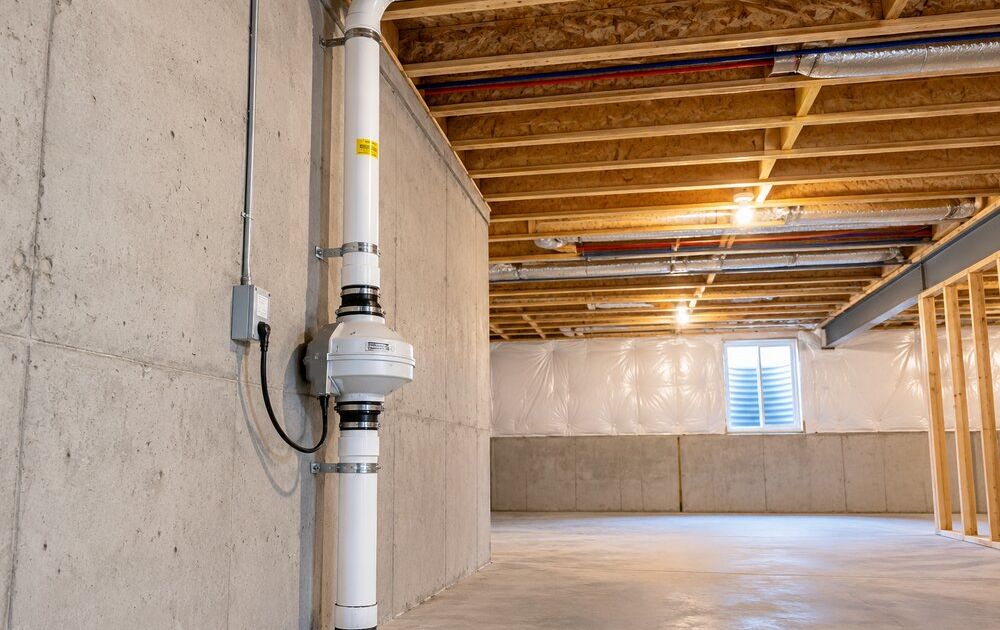
After years of testing homes in York County, I have seen the same pattern play out more times than I can count. A homeowner gets a radon test result back, sees a number above the EPA action level of 4 pCi/L, and immediately starts looking for a fix. The first question is almost always about the cost, but the second, more practical question is about what actually goes into a proper radon fan installation. That is where a lot of confusion sets in. People hear terms like sub-slab depressurization and assume it is some kind of high-tech mystery. In reality, it is a straightforward mechanical system that relies on a radon mitigation fan to pull soil gas from beneath the house and vent it safely above the roofline.
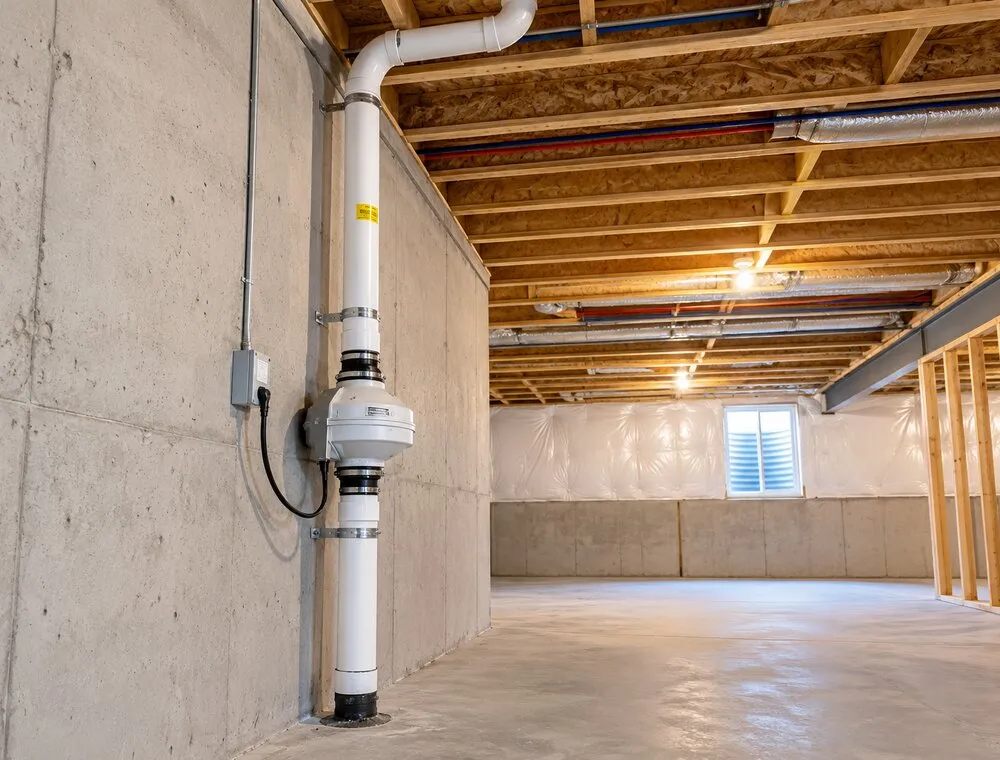
The core idea is simple. A PVC pipe runs from a radon suction pit or a French drain system under the slab, connects to a fan, and exhausts the gas outside. But the execution matters a lot. I have walked into crawlspaces where someone tried to save money by using a bathroom vent fan instead of a proper radon mitigation fan. That does not work. Radon fans are designed to run continuously for years, move air against static pressure, and handle the moisture and temperature swings that come with being installed in an unconditioned space. A radon fan installation that uses the wrong equipment will fail, sometimes quietly, and the homeowner will never know until they retest.
Sub-Slab Depressurization in Practice
The most common method for reducing radon levels is sub-slab depressurization. This technique creates a low-pressure zone beneath the concrete floor of a basement or slab-on-grade foundation. The fan pulls the soil gas from under the house and dumps it outside before it can seep through cracks or gaps. In York County, where many older homes sit on cinder block foundations, this approach is especially effective. The porous nature of cinder block walls and the joints between blocks create ample entry points for radon. A well-designed system counters that by reversing the pressure differential.
I recall a job we did in a 1950s ranch home near the Codorus Creek. The original foundation was cinder block, and the basement had a French drain that was actually working against us by channeling water and radon together. We tied into that French drain to create our suction point, installed a SUPCO manometer to monitor the system, and ran the PVC pipe up through a closet. The radon fan installation itself took about four hours, but the testing and planning took longer. The post-mitigation test came back at 1.2 pCi/L, well within safe limits. The homeowner was relieved, but they also had questions about the manometer and what it was telling them.
Reading the Manometer and Understanding System Health
A U-tube manometer is a simple device that shows the pressure difference between the inside of the pipe and the surrounding air. A SUPCO manometer, which is common in this trade, uses a colored fluid that rises and falls as the pressure changes. If the fluid levels are equal, the system has lost suction. That could mean a blocked pipe, a failed fan, or a leak in the system. I always tell homeowners to check the manometer monthly, especially after heavy rain or freeze-thaw cycles. A properly designed radon fan installation will hold steady pressure for years, but nothing is maintenance-free.
One detail that gets overlooked is the flashing around the pipe where it exits the roof. If that seal fails, water can run down the pipe and into the fan, which will eventually kill the motor. I have seen fans short out because the installer skipped the flashing or used cheap caulk. A little extra attention to the roof penetration during the radon fan installation can prevent a lot of headaches later. And it is not just about the fan itself. The pipe routing matters. Long horizontal runs or too many elbows can increase static pressure and reduce the fan's effectiveness. Every bend adds resistance, so the shortest, straightest path from the suction pit to the exterior is usually the best.
Testing Before and After
The National Radon Program and the EPA both recommend testing every two years, but I suggest testing before any mitigation work and then again after the system is running. The post-mitigation test is the only way to know if the system actually works. A summa canister or a RAD-40 device can be used for the initial test, but for the follow-up, I prefer a continuous monitor or a short-term test using activated carbon. The key is to run the test under normal living conditions. Keep windows closed, run the HVAC as usual, and leave the fan running. Some people try to game the test by opening windows or turning off the fan, but that only hurts them in the long run. They need to know the real levels.
I had a client in a townhouse near downtown York who insisted on doing the radon fan installation themselves. They bought a fan online, ran the pipe through a basement window, and called it done. The post-mitigation test showed levels even higher than before. When I went to look, the fan was pulling air from the basement instead of from under the slab. The pipe was not sealed at the floor penetration, so the fan was just recirculating basement air. That is a common mistake. Sub-slab depressurization only works if the system is sealed at every joint. A single gap can compromise the entire system.
Warranty and Long-Term Considerations
A good mitigation system warranty covers the fan and the labor for at least five years, sometimes ten. But the warranty is only as good as the company that stands behind it. I recommend asking about the warranty before the work starts, not after. Some companies offer a performance guarantee that promises the post-mitigation test will be below the EPA action level. That is a strong commitment, but it also means the installer has to design the system correctly the first time. A radon fan installation done right will last the life of the home with minimal maintenance. The fan itself might need replacement after ten to fifteen years, but the pipe and the suction pit will keep working as long as they stay dry and clear.
One more thing about the suction pit. In some homes, especially those with a high water table, the pit can fill with water and block the airflow. A sump pump or a drywell might be needed to keep the pit dry. In other cases, the pit is simply a hole in the gravel under the slab, and the fan pulls dry air through the gravel. That is the ideal scenario. But I have seen French drains that were intended for water management become part of the radon system. That can work, but it adds complexity. The trade-off is that a French drain system might require a larger fan to overcome the extra resistance from the gravel and the water.
If you are in York County and thinking about mitigation, start with a test. Use a short-term activated carbon test or a RAD-40 device to get a baseline. If the number is high, call a professional who knows local soil conditions and foundation types. The radon fan installation is not a weekend DIY project for most people, but with the right help, it is a straightforward fix that protects your family for decades. And once the system is in, check that manometer once a month. It is your window into whether the system is still working. A little attention goes a long way.